How to use Blender quickly for a paper
When I wrote my first SIGGRAPH paper, I spent far too long learning how to render decent figures. There is no shortage of Blender tutorials on YouTube, and they are genuinely useful, but if all you want is a static render for a paper, they cover much more than you need. What follows is the smallest set of tricks that actually got me there — written down as much so that I don’t lose track of them as to share them.
GPU rendering makes your life easier
Before learning anything else, make sure Blender is actually rendering on your GPU, if you have one. I forgot to turn this on at first and wasted a lot of time.
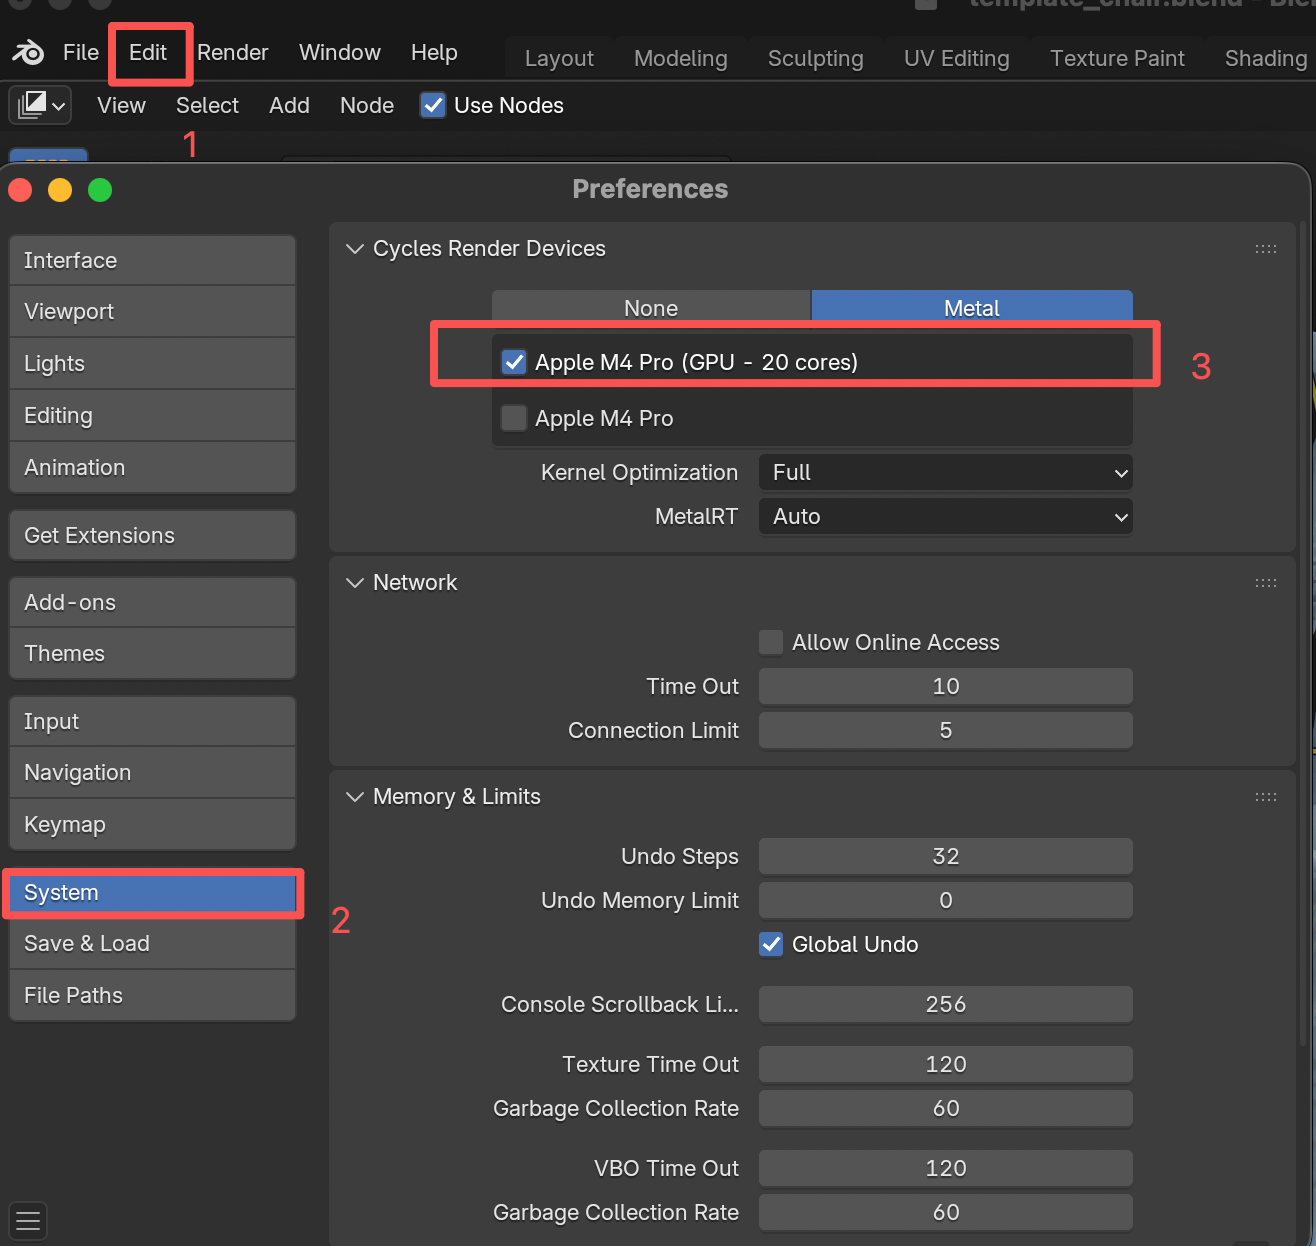
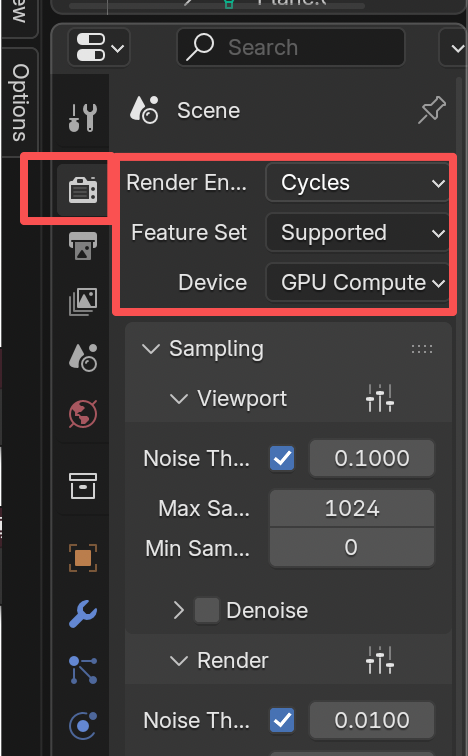
In Edit → Preferences → System, check that your GPU backend is selected (Metal on a Mac, CUDA or OptiX on NVIDIA). Then switch the device to GPU in the Render properties. Once that is done, keep an eye on your GPU usage the first time you render — that is the quickest way to confirm it took effect.
The interface
There is not much to master. The image below marks in red every panel I used for my first paper.
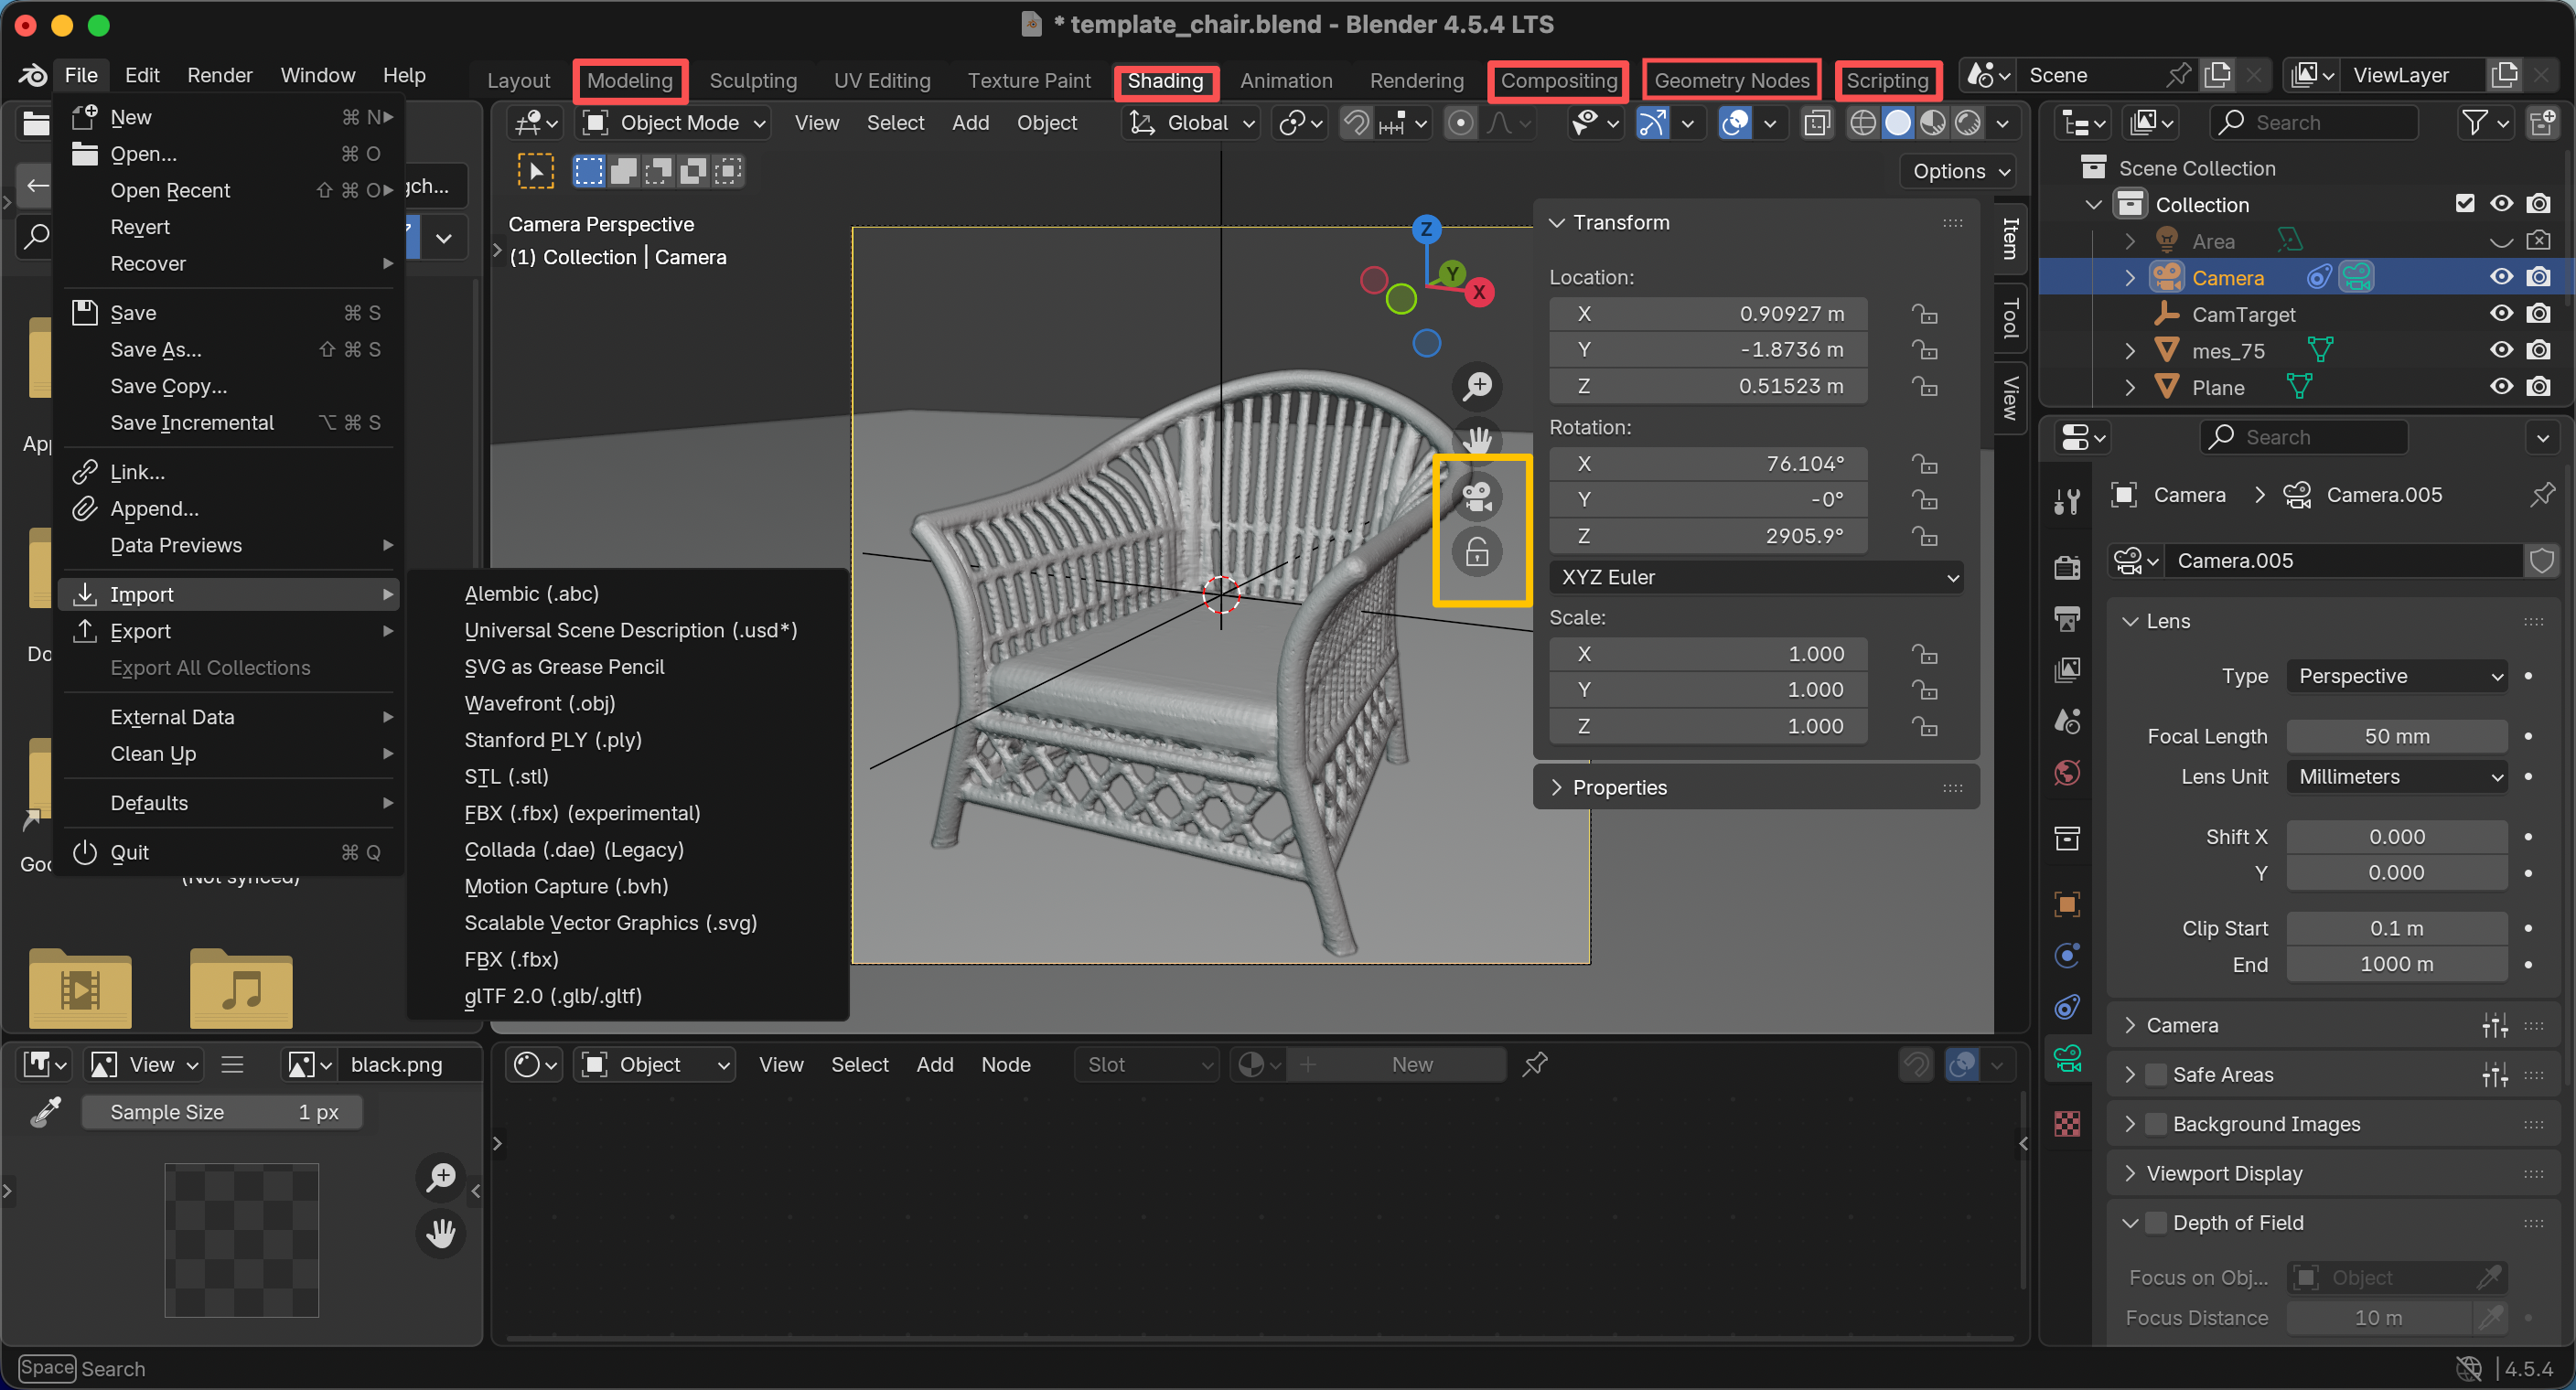
Importing a mesh in any common format is just a matter of the buttons on the left. The two adjacent buttons in the yellow box control the camera: the upper one jumps the viewport to the camera view, and the lower one binds the camera to the viewport, so that rotating or panning the scene moves the render view along with it. You have to click the upper one first (Numpad 0) for the second to do anything.
Shadows and a transparent background
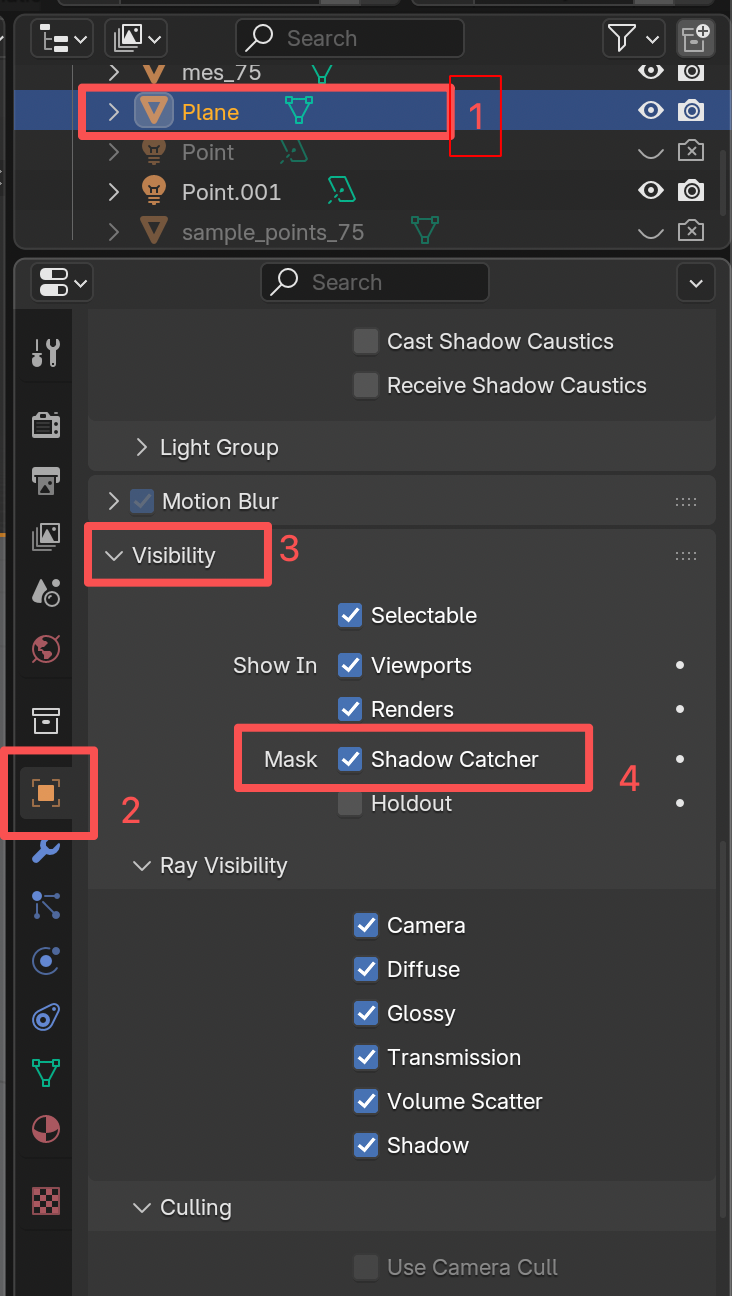
I usually add a plane underneath the object to catch a shadow — without one the shape looks like it is floating, or just fake. The steps below put the plane at the right position and size.
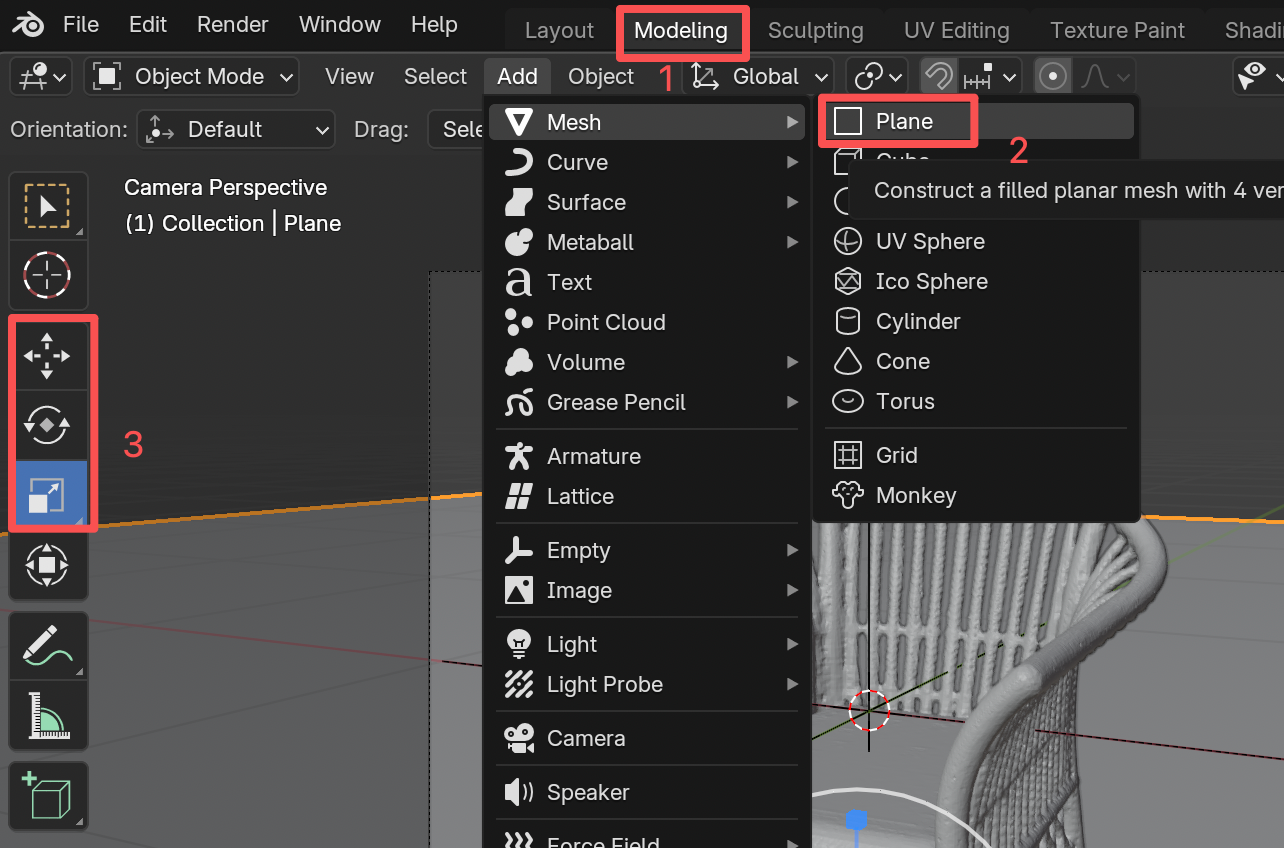
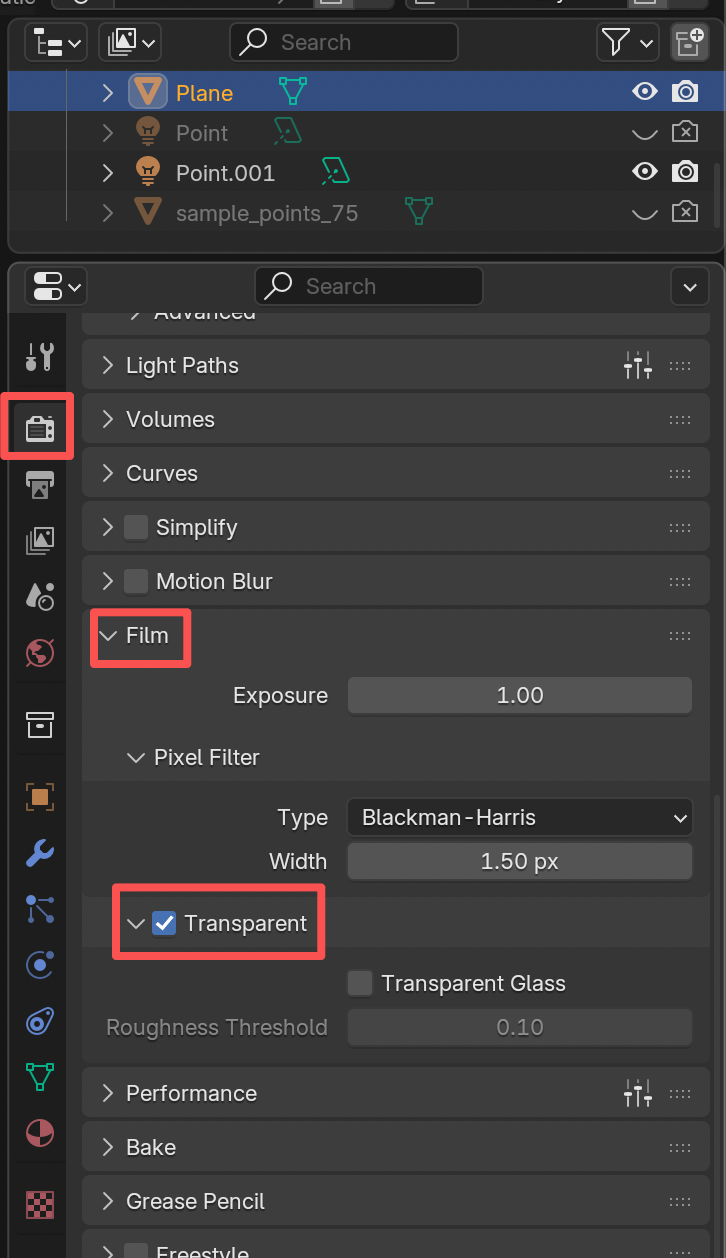
We usually want a transparent background too. For me the reason is not that the plane or the background covers the paper — the paper is white and the render has a white background anyway — but that the shadow is sometimes too large and too long. Crop the image and the shadow gets abruptly truncated at the edge. Making the plane a shadow catcher and then fading the alpha of the result avoids this.
Shadow catcher and transparency
Fading the shadow in the compositor
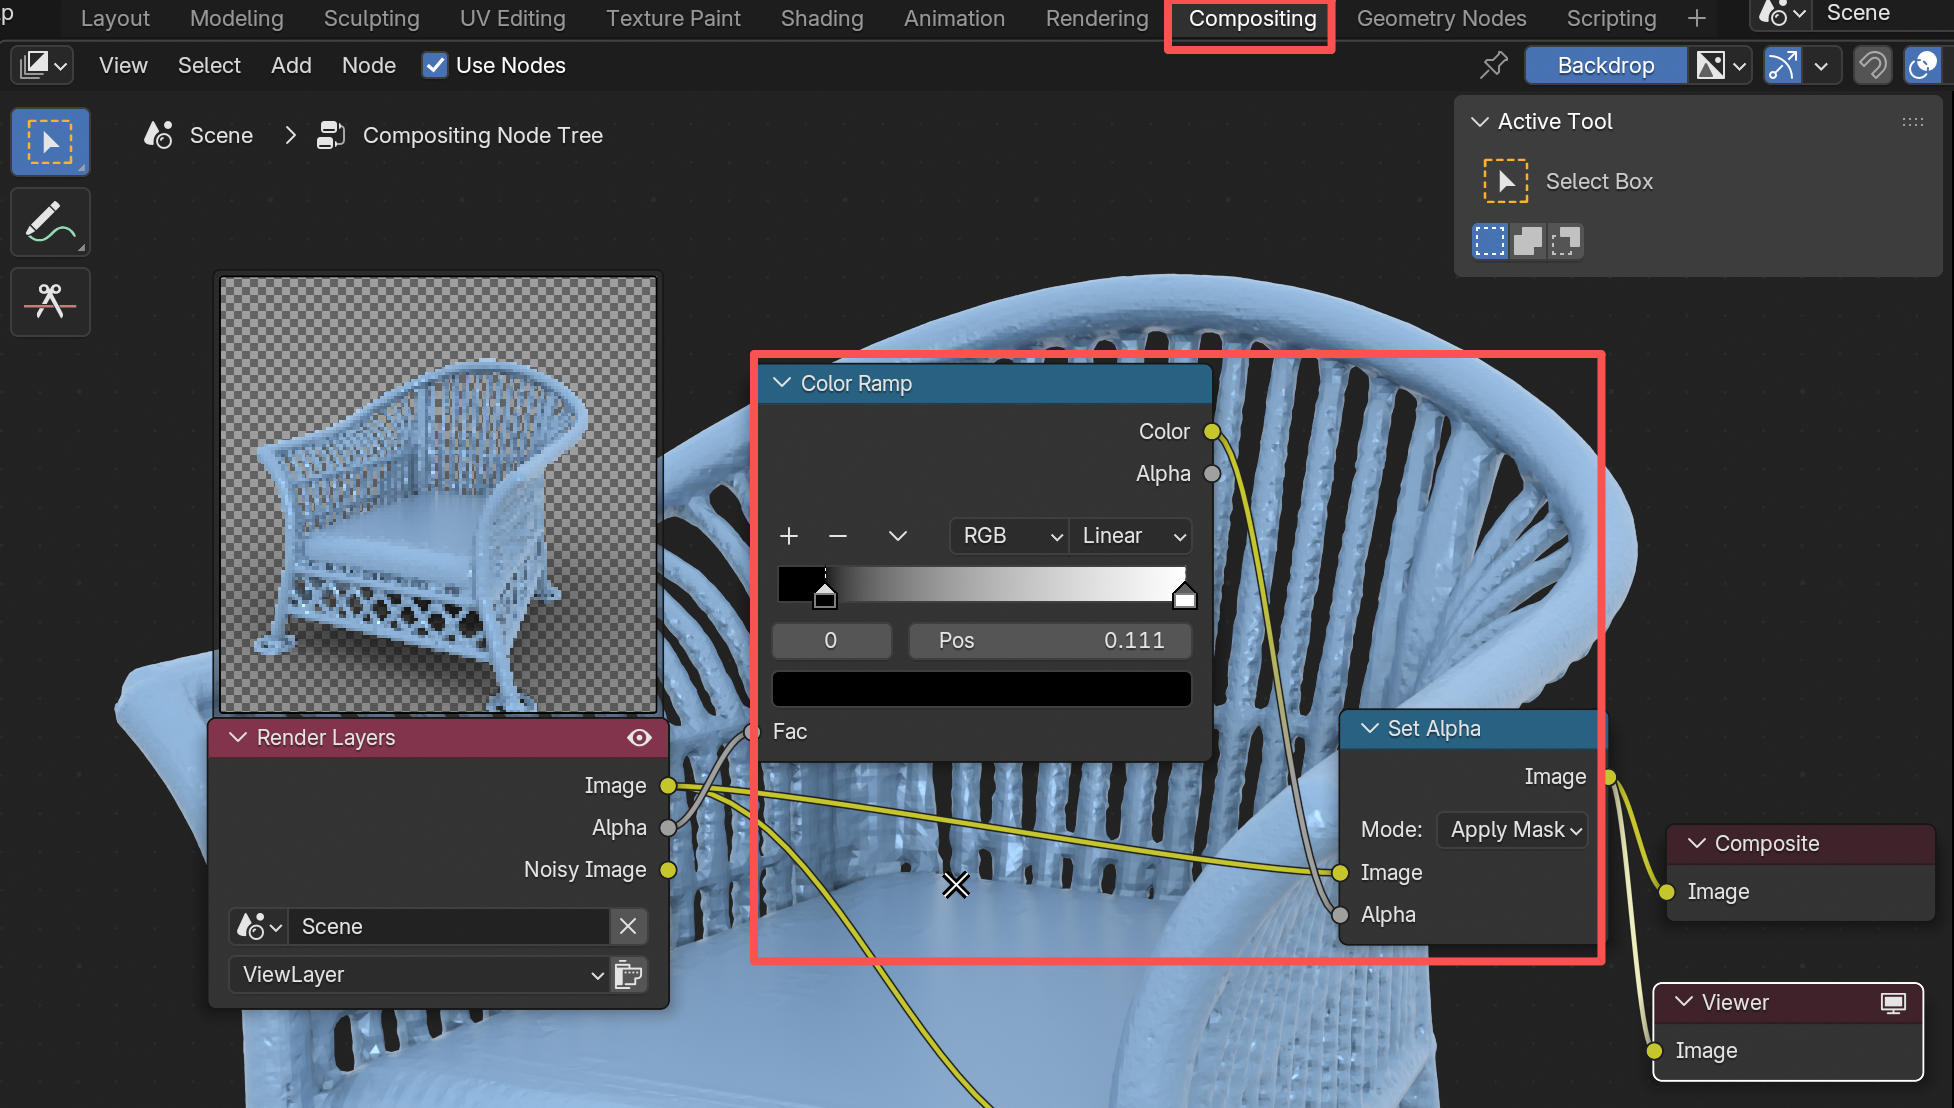
Compositing is a post-processing step applied to the rendered image. The render enters on the left through the Render Layers node and flows through whatever nodes you add into Composite and Viewer. Composite is the final result that gets saved; Viewer is just a convenient preview in the backdrop. To add the nodes we need, first check Use Nodes, right click and pick Add → Color → Color Ramp and Set Alpha, then wire them up like this. Dragging the two stops on the Color Ramp is what controls the falloff — move them closer together for a sharper shadow edge, further apart for a longer fade.
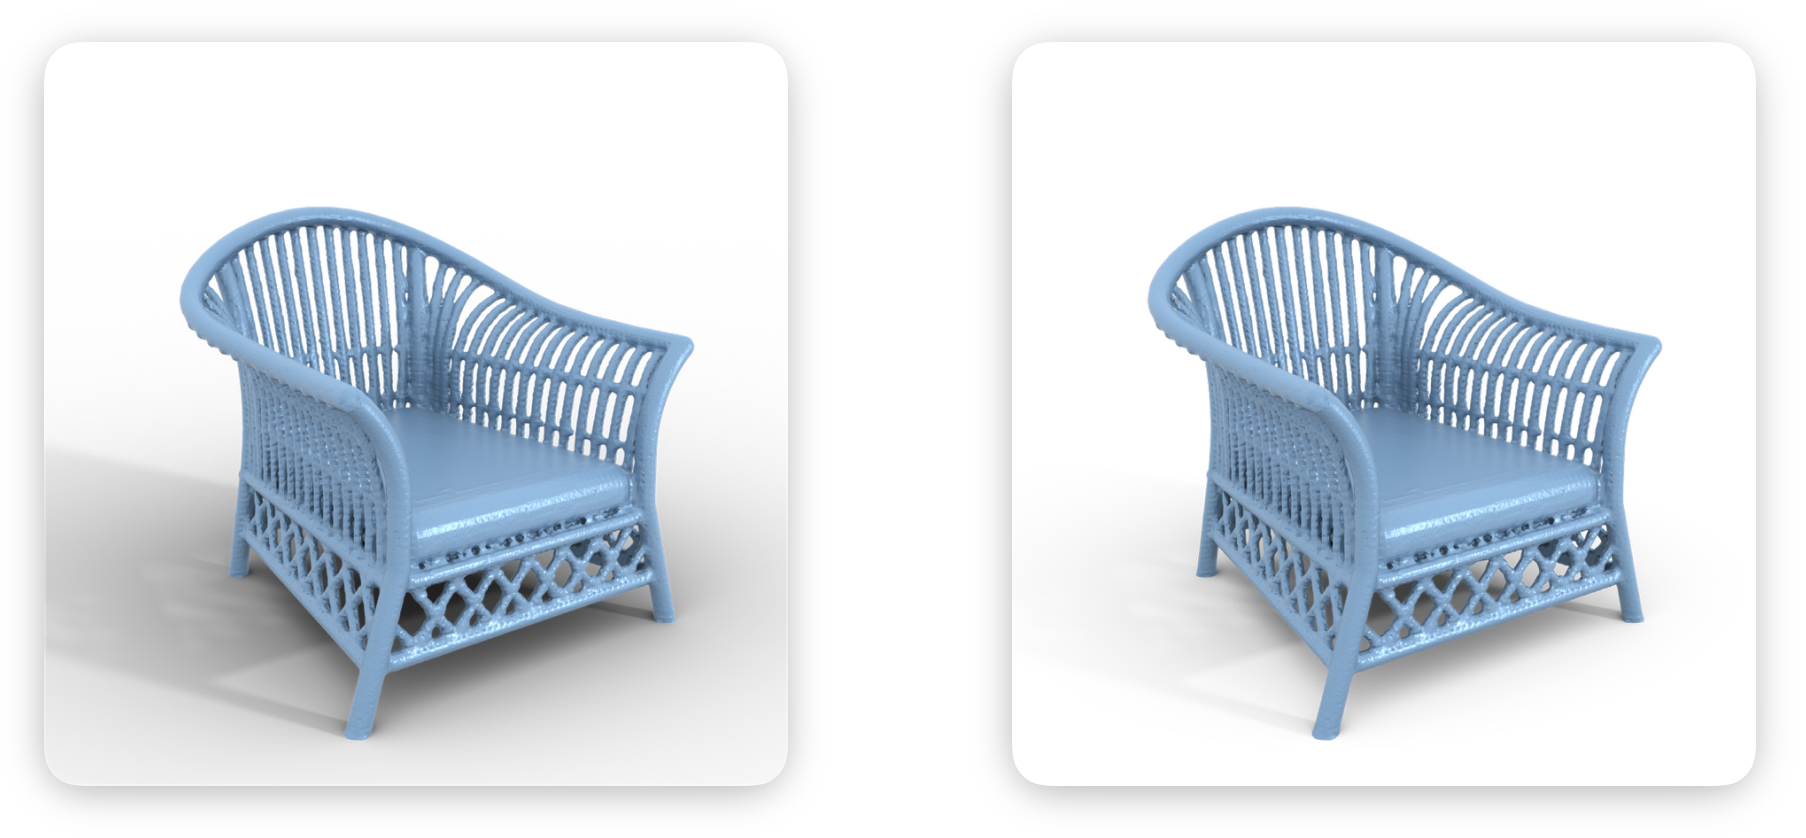
Finally, press F12 to render, then save the image. Here is the comparison — both renders use the shadow catcher, and the only difference is the compositing step above:
Materials
Click the Shading tab, then the button at the top right marked in the image below, to preview the material.
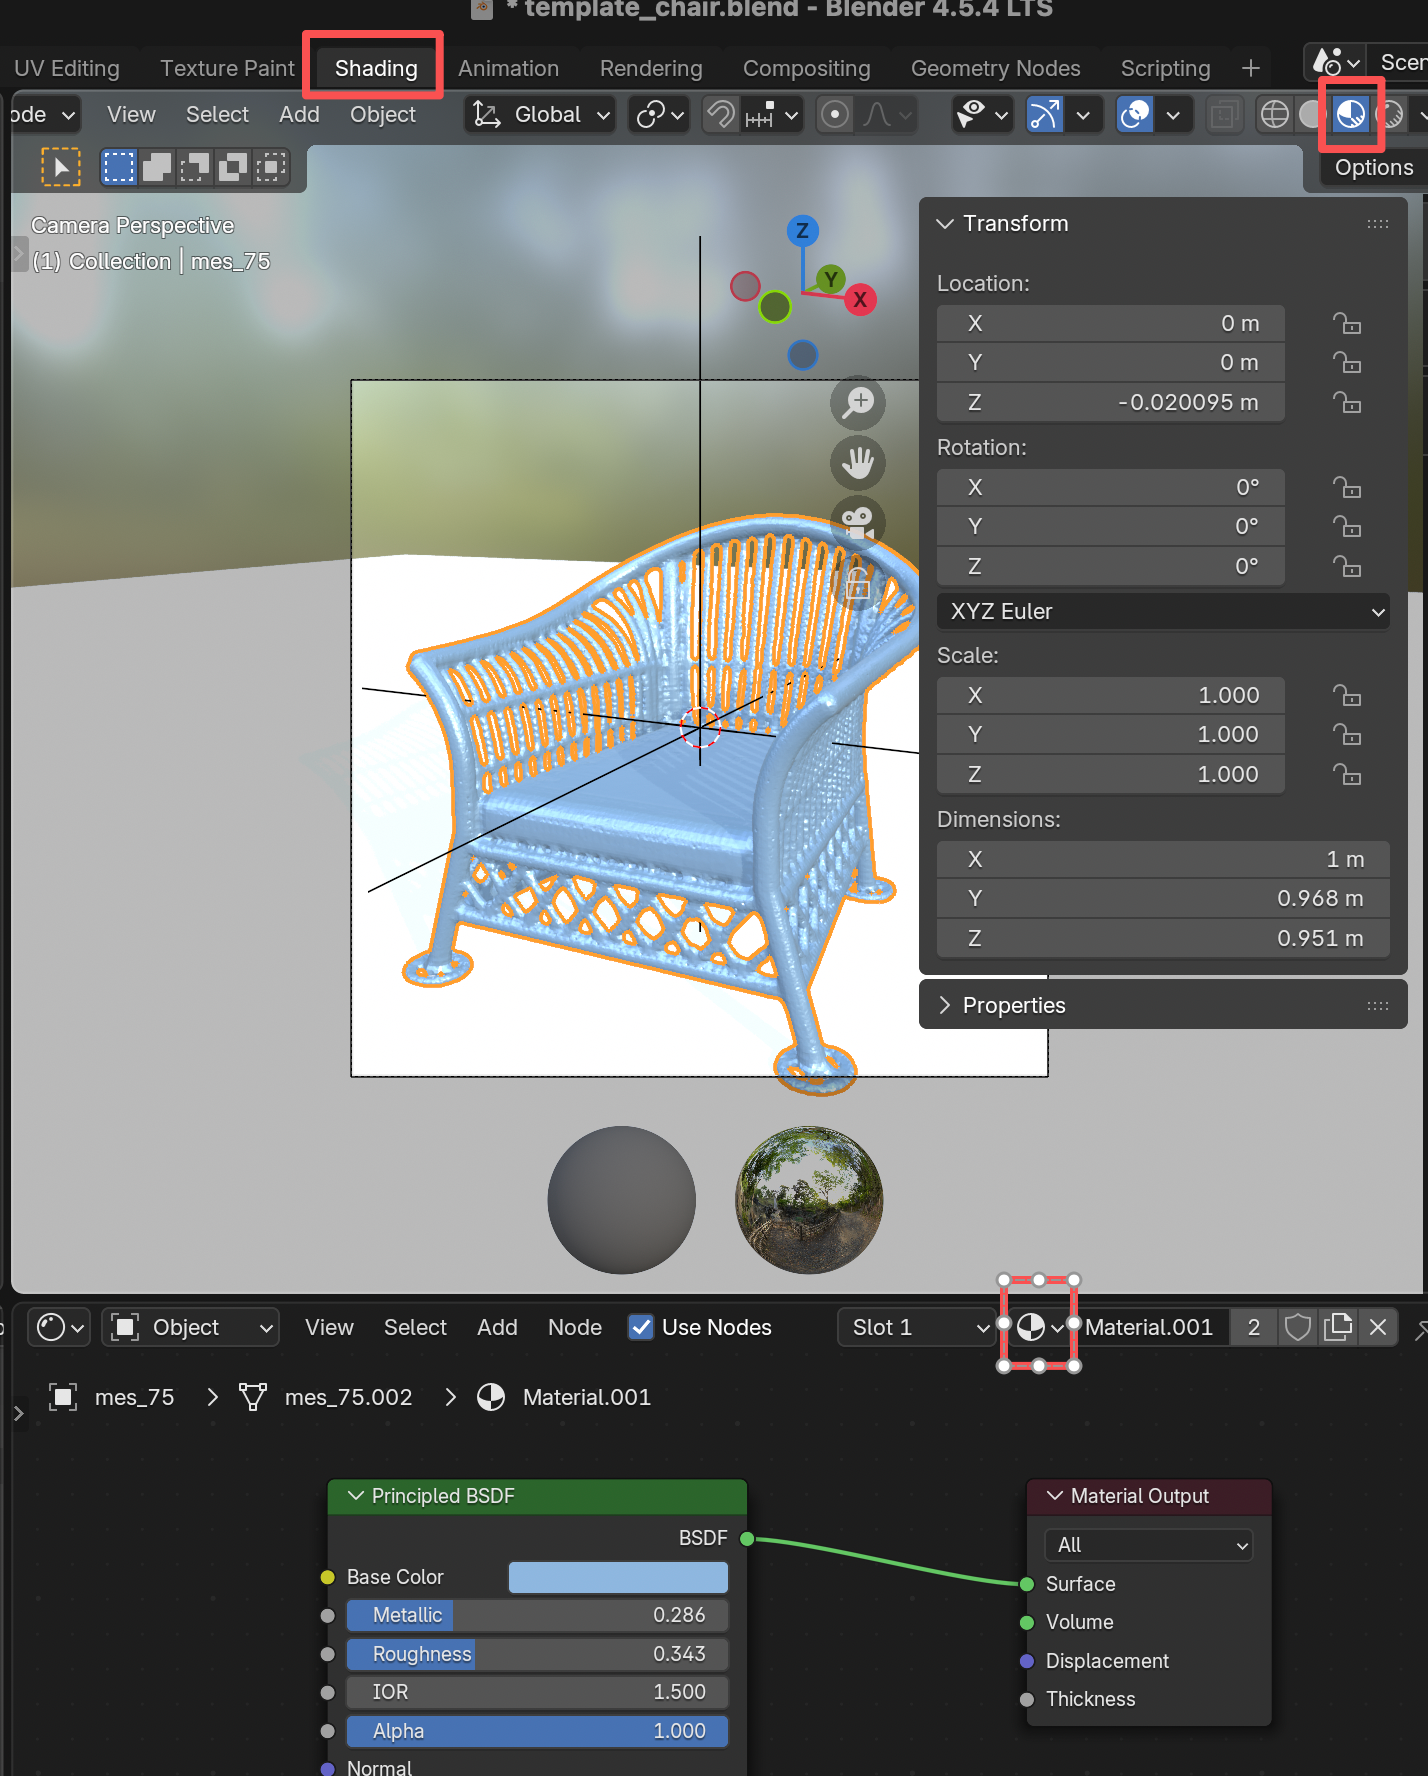
Shading is really nothing more than tweaking a handful of parameters. A material you build for one object is saved with the file and can be reused on any other object. You can also download a MatCap (Material Capture), though I never needed one. Just play around.
Prof. Silvia Sellán has written a useful post on the same topic, Blender Course, and her template file comes with a set of PBR materials.
One material, many objects?
Assigning the same material to a lot of objects one at a time gets old fast. This video walks through how to do it in one go.
Point clouds from .ply files
Blender does not render a .ply point cloud by default, but you can turn it into geometry that does show up. Start by clicking the .ply object and adding a Geometry Nodes modifier.
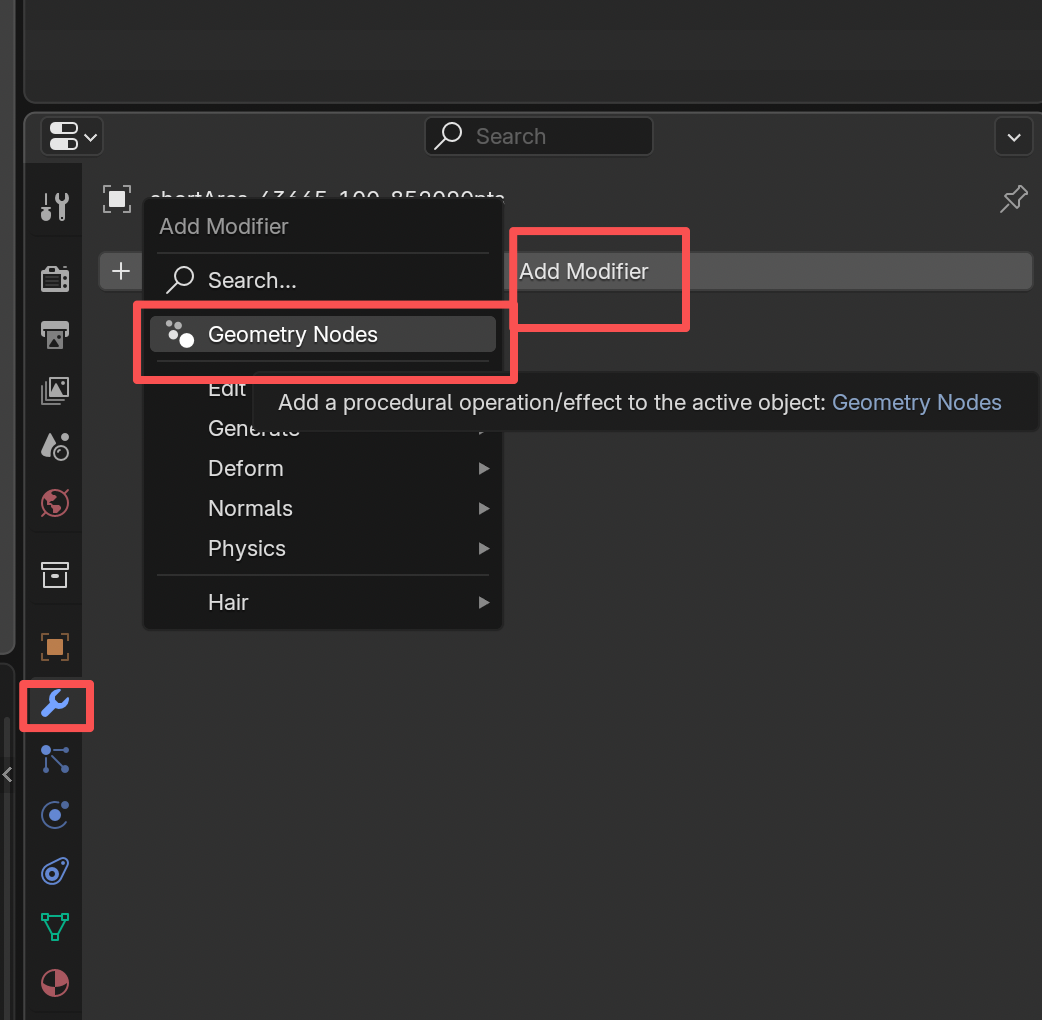
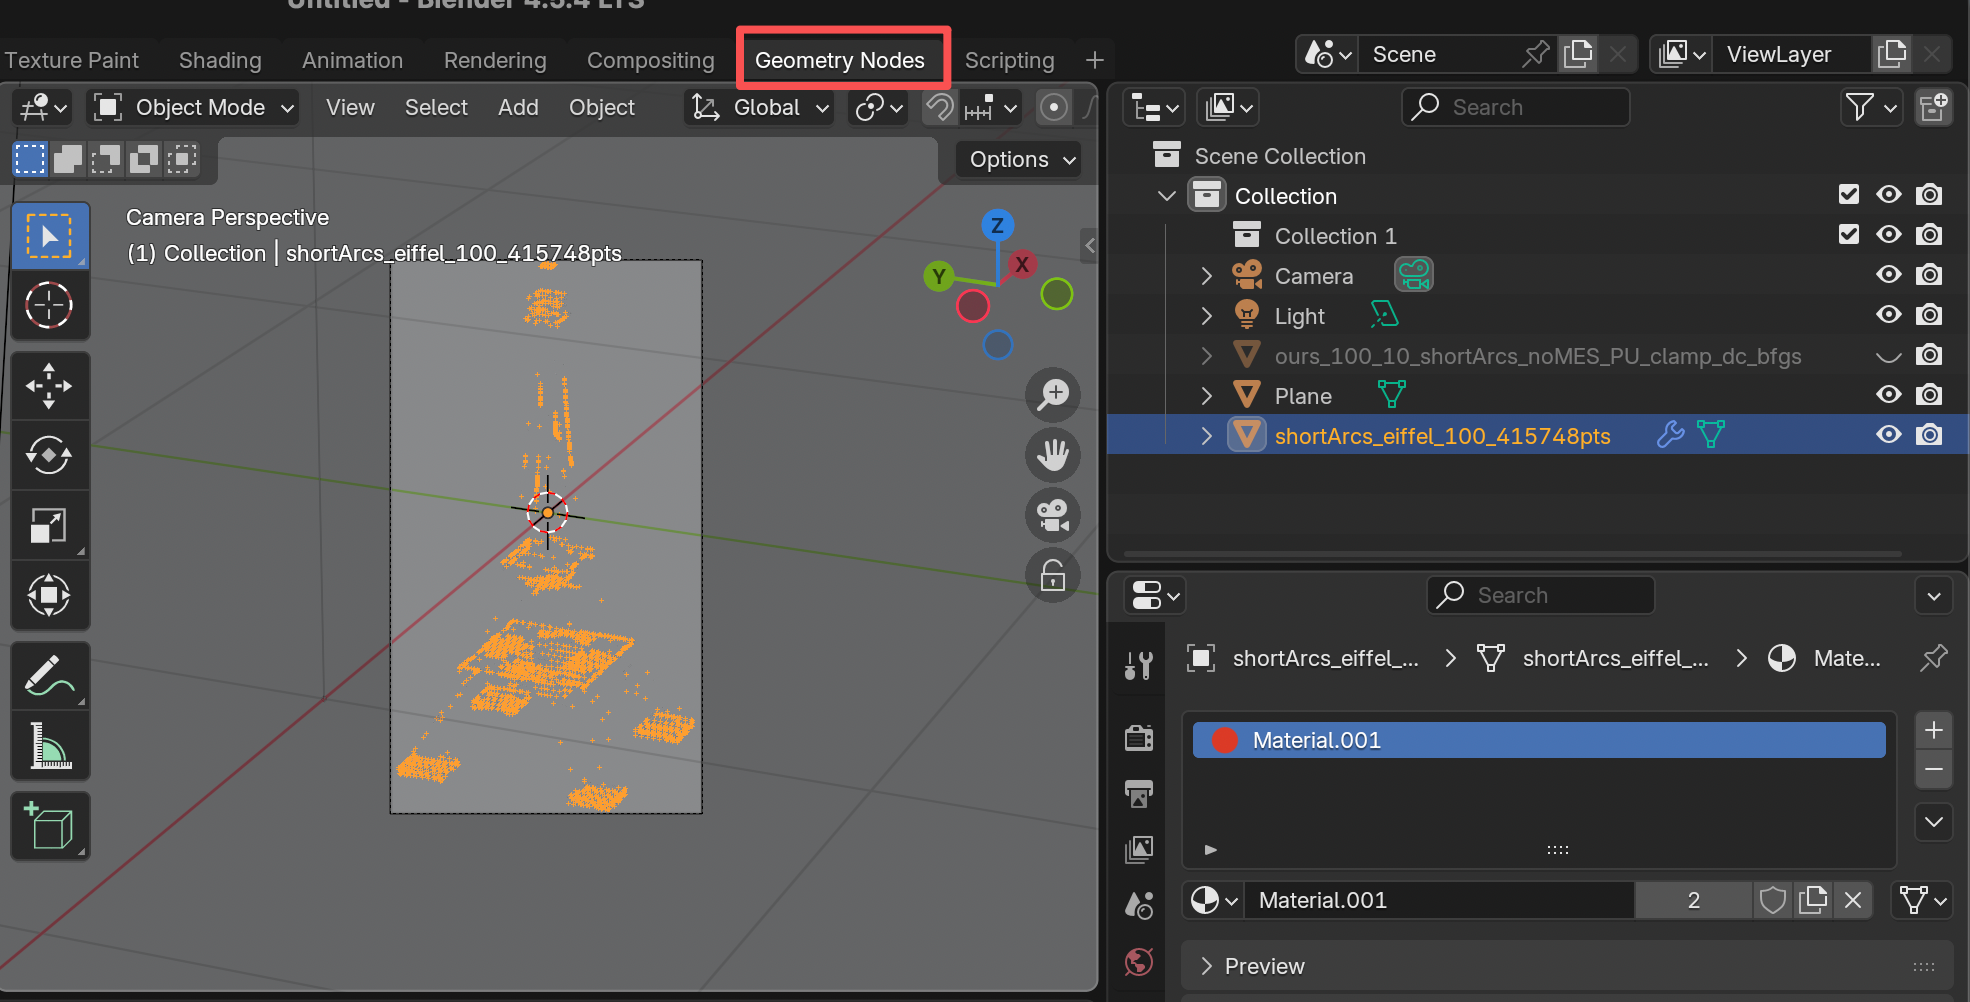
Then navigate to the Geometry Nodes panel.
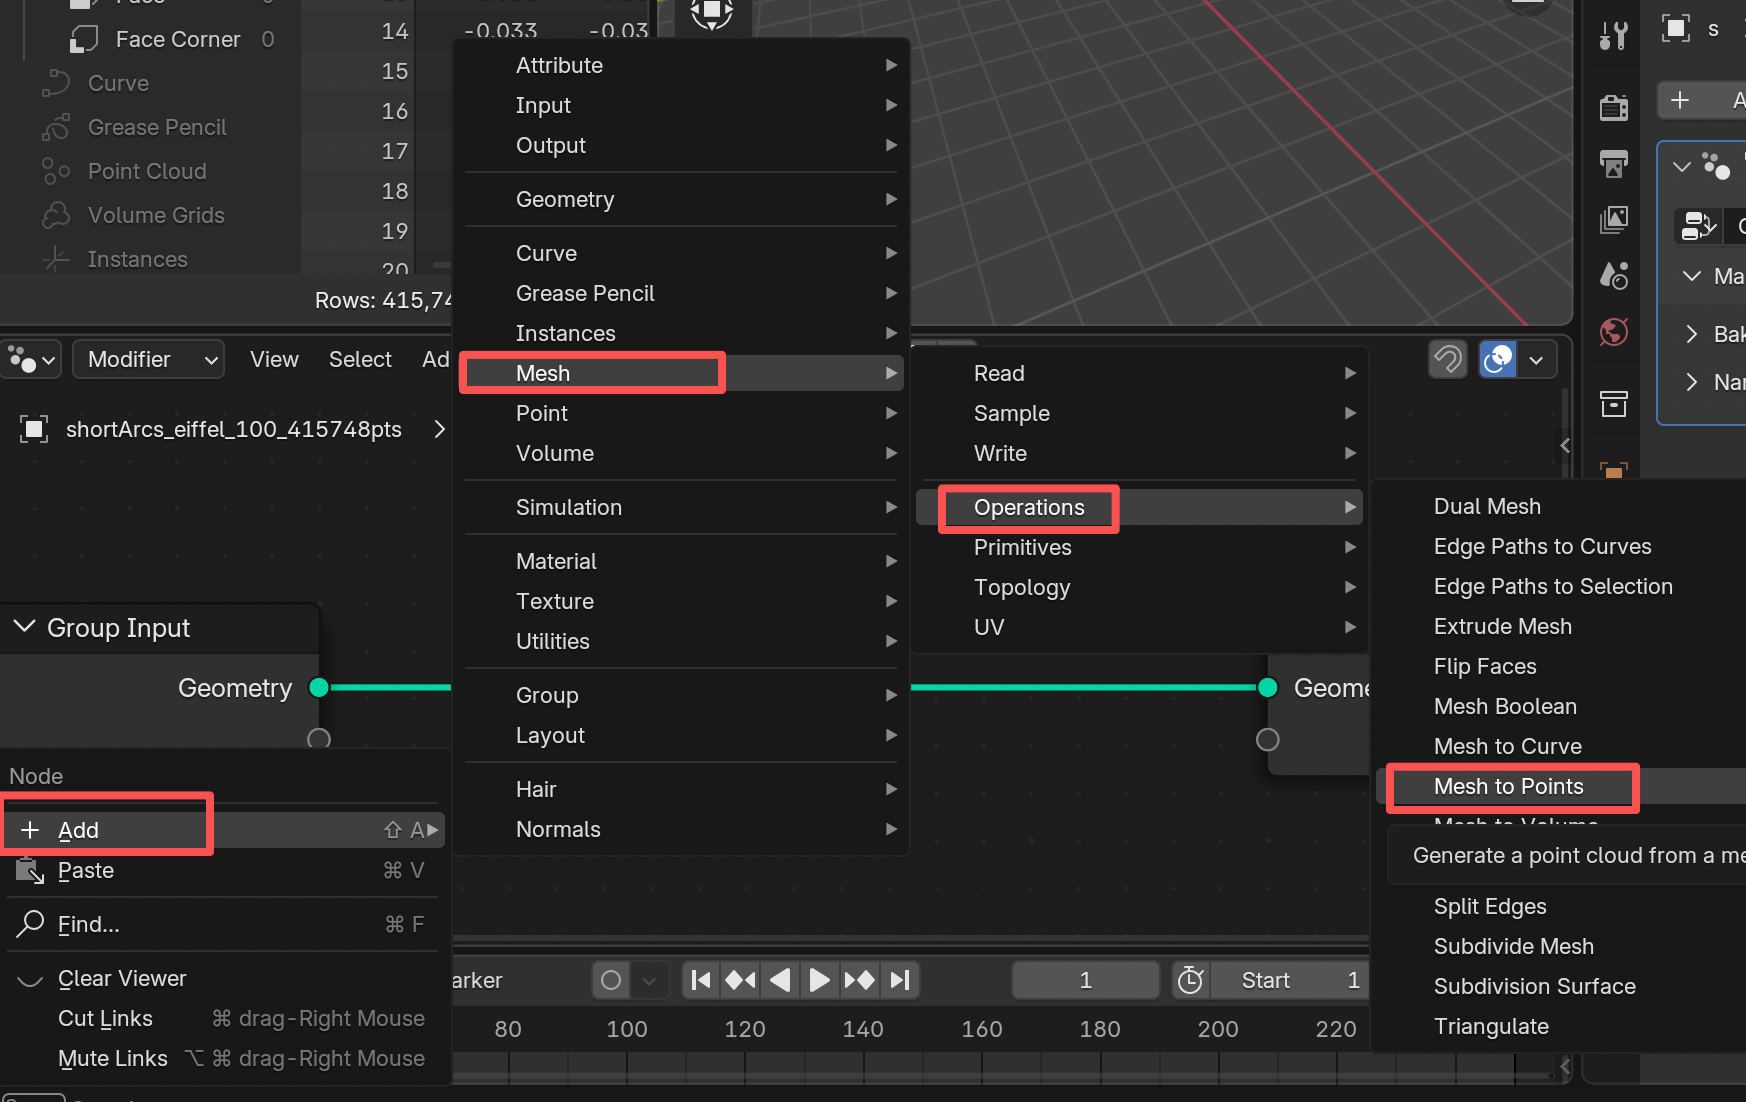
In the lower half, add and connect two nodes: Mesh to Points → Set Material. The Radius value in Mesh to Points controls how large each point is.
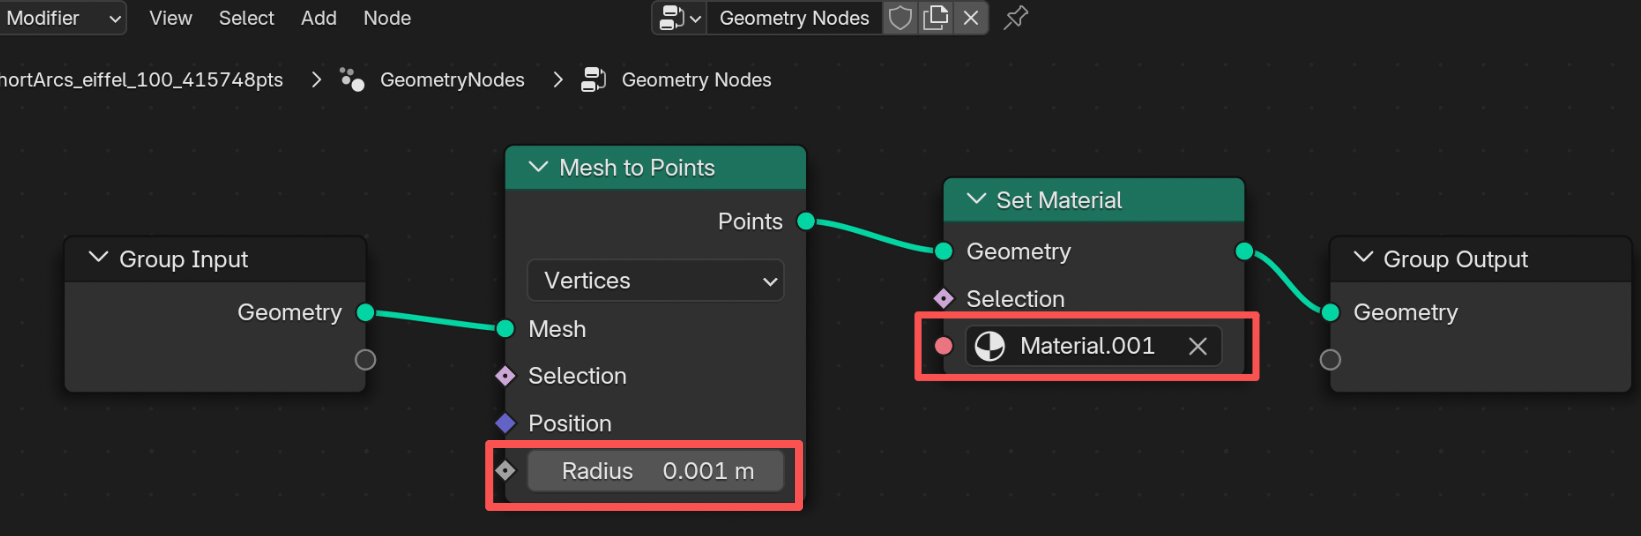
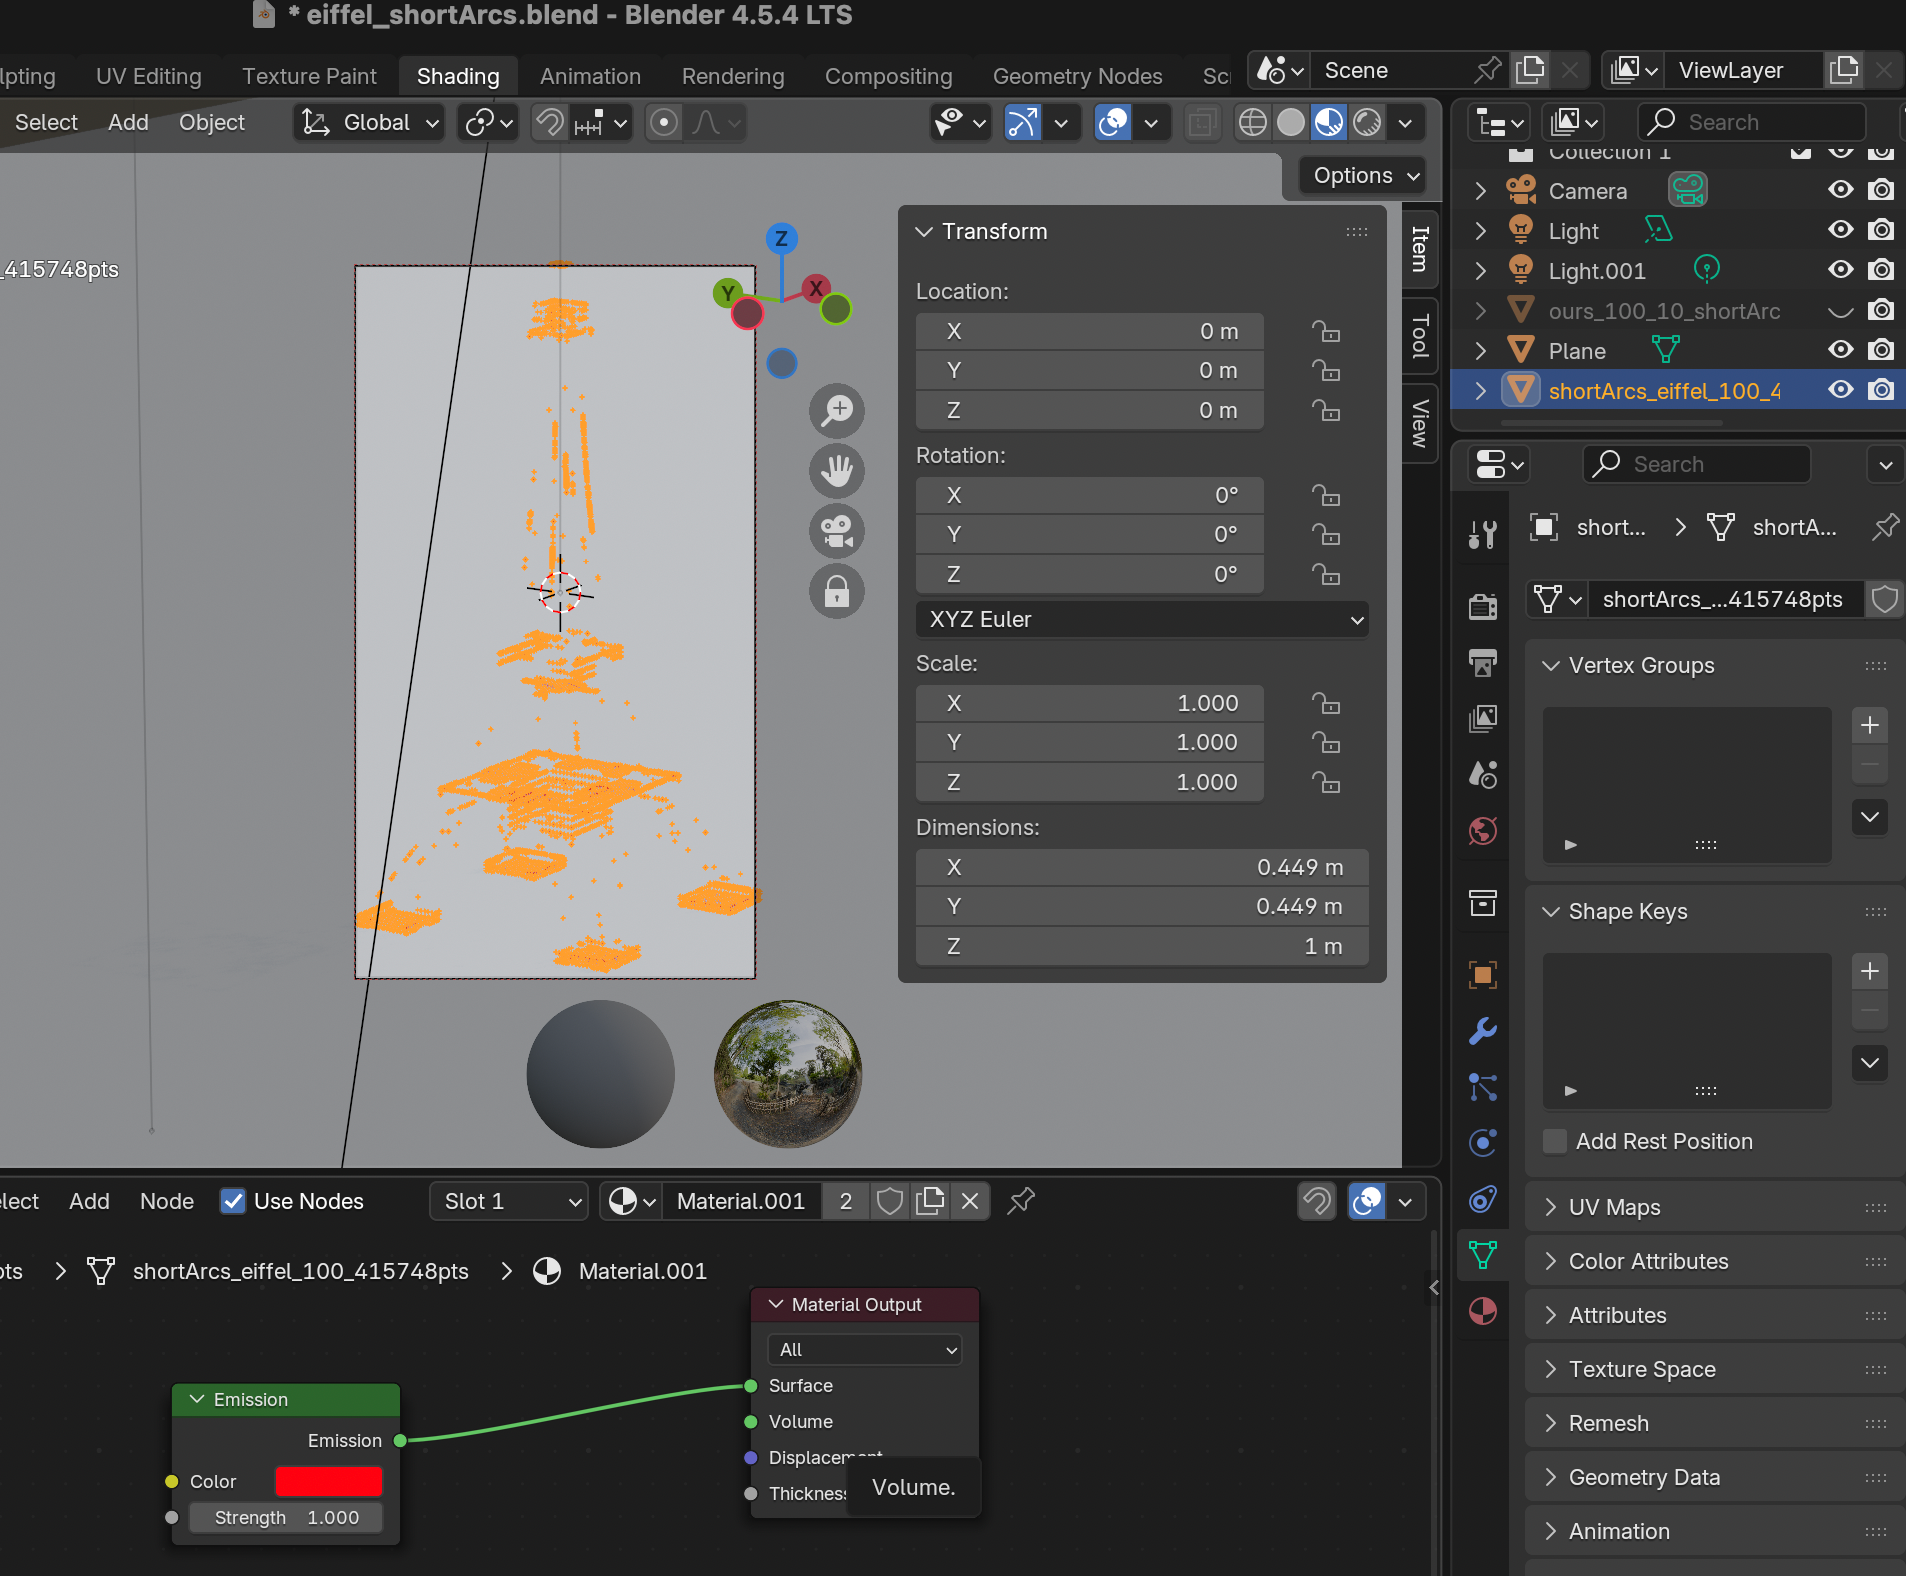
To give the point cloud a color, or make it emissive, point the Set Material node at a material you build in the shader editor. Mine looks like this:
Scripting
Once everything looks right, you can just ask an AI agent to write the code that renders a whole batch of images from the Scripting panel. It works well enough that there is not much more to say about it.